The theme editor allows you to customize the overall background color for your widgets.

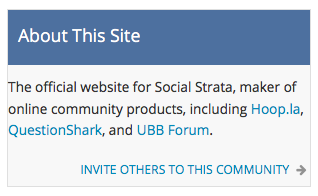
Here's a typical widget styled using the the theme editor only:

Screen Shot 2015-11-05 at 9.08.33 AM

Change Title Font Properties

If you just want to change the widget title's font size, color, or weight (how bold it is), apply CSS like this (setting your own specific colors, sizes, weights):

header.widget-header h3 { 
  color: #4d709f; 
  font-weight:400; 
  font-size:1.1rem;
}


Note that you should be using REM units for font size, not pixels. That way, your font sizes will be responsive (adjust depending on screen size). Once you've made this change, your widget will look like this:

Screen Shot 2015-11-05 at 9.21.06 AM

Apply Background Color To Widget Title

If you would like to apply a different background (and text) color to the widget, add this CSS:

/* first remove padding from widget box: */
.widget-box { padding:0; }
/* set padding/margin for header row and apply background color: */
 header.widget-header{ 
    padding:10px; 
    margin-bottom:10px; 
    background-color:#4d709f; 
}
/* apply custom font color to the title, if necessary... 
or change weight of font: */
header.widget-header h3 { 
  color: #ffffff; 
  font-weight:400; 
}
/* apply padding to widget body in general */
.h-widget-body { padding:10px; }


You will want to swap out the background-color and/or text color hexidecimal color codes to match whatever color you want to use.

After adding that CSS, your widget looks like this:

Screen Shot 2015-11-05 at 9.15.59 AM


Apply Rounded Corners

If you want your widget to have rounded corners, you'll want to add some CSS to the .widget-box and the header.widget-header, like so:

.widget-box { 
    border-radius: 5px 5px 5px 5px ;
}
header.widget-header { 
  padding: 5px 10px 5px 10px;
  border-radius: 3px 3px 0 0 ;
}


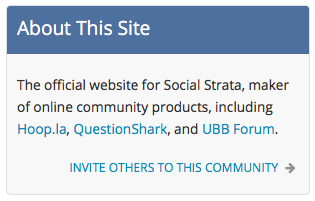
Now your widget will look like this:

Screen Shot 2015-11-05 at 9.44.55 AM

Change Border Style For Widget

By default, the border you set in your theme for your widget will be applied as as a solid 1 pixel in the color you define. However, you can change that border presentation using CSS.

For instance, here is code to override the default border style by setting a thicker border only on the left side of the widget. We'll also add some more margin to the bottom of the widget so that the lines do not appear to run together.


.widget-box { 
   border-left: 2px solid #d4d4d4; 
   border-right:none; 
   border-top:none; 
   border-bottom:none; 
   margin-bottom:35px;
}


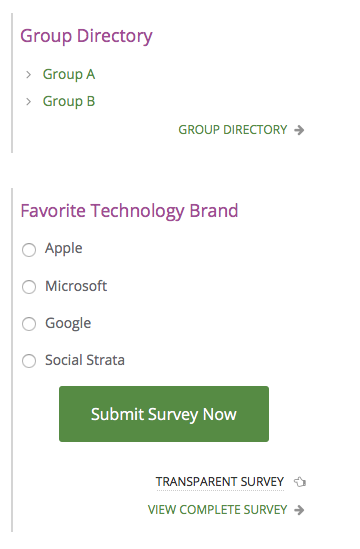
Here's what our border-left-only widget looks like:

Screen Shot 2015-11-05 at 9.53.24 AM

Hopefully, you can see how easy it is to slightly tweak the example above to set a top-only border or a bottom-only border, as well.

Attachments

Images (5)
  • Screen Shot 2015-11-05 at 9.08.33 AM
  • Screen Shot 2015-11-05 at 9.15.59 AM
  • Screen Shot 2015-11-05 at 9.21.06 AM
  • Screen Shot 2015-11-05 at 9.44.55 AM
  • Screen Shot 2015-11-05 at 9.53.24 AM

Replies sorted oldest to newest

Thank you Ted. Is there a CSS code that I can use for the background of the widget to be a color instead of the background image of the theme?

If so, would this be placed in the customize widget or the theme?

C

Good evening,

The REM value is derived from the "Base Font Size" setting defined within your theme:

CP -> Design -> Standard Themes

If you edit your theme you will see the setting in the "Fonts" section.  Consider a REM value a multiplier of that value.  So if you have a "Base Font Size" of 16px, and you want to target a element to use a 12px font size you would set the REM value to 0.75rem.  That is 16px * 0.75 = 12px.

I think I can sense what you are thinking: "But Jonmark, why wouldn't you just set the font size explicitly to 12px?"

If you were thinking that question great, if not, then I apologize because I am throwing a answer at you anyways:

The reason you would use a rem value over a explicit px value is because if your user has their browser set to increase/decrease the base font size then the calculated value for that user may be more or less than 12px.  For example, some users may have poor vision and need to use a larger font size, so their browser could be set to use a base font size of 24px, which would result in a 0.75rem value of 18px.

This helps ensure that users see the site based on their needs, while providing you the ability to configure things to a base style that you think works best.

Does that help?

Jonmark

Jonmark @ Crowdstack

Hi, Thanks for the explanation. It still doesn't help.  In what way do I write the font size??? 12px?  12 pt?? I have set my font size in a widget which has my welcome pagagraph, and no matter what I do to it, it is displaying what I would call 2pt type.  Please HELP!!!!!

jpmfan

Okay I really need help!!! All my pages are displaying in this super tiny font, including Private Messages!! Please tell me what to set, where to set it, so it displays as 12 point type!!

AAAGGHHHH!!!!!!!!!!!!!!!!!!!    I don't have the time to screw around with this!!!!!

jpmfan

Add Reply

×
×
×
Link copied to your clipboard.
×